# Creating and Editing
Assertion management is only available to logged in users, ensure you are logged in to the application before continuing.
# Enabling Assertion Management
Open any framework and you should be presented with a manage assertions button in the top toolbar

To return to the framework editing mode, simply press the stop managing assertions button in the top toolbar

# Choosing a Subject
You can choose to make assertions about yourself, or another user in the system. In order to change the subject of your assertions, click the myself button and select a new user from the resulting dialog.

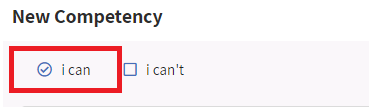
# Creating an Assertion
Once in the assertion management mode, the competencies in the framework will display new controls to create either a positive or negative assertion, indicating that a user can or cannot perform the competency respectively.
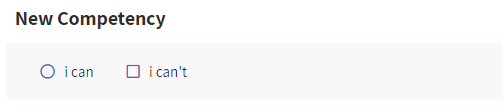
Clicking the I can button will generate a positive assertion for that competency and display an input field allowing you to provide evidence in the form of text or a link to support the assertion. Press enter on your keyboard after entering the evidence into the input field to attach it to your assertion.

The evidence will appear in a section underneath the input field, along with a button to delete that evidence if desired.

# Deleting an Assertion
To delete an assertion, simply click the same button that was used to create the assertion. In this case, the I can button.
# Adding a Badge
You can add a badge to a positive assertion by clicking the add badge button.
![]()
This will generate a url for the badge that can be viewed by clicking the view badge button and then shared.
![]()